
Table of Contents
- How to Seal Windows for Dust Storms: What You’ll Need
- Identifying Window Air Leaks and Dust Entry Points
- How to Clean Dust Out of Window Tracks Before Sealing
- Best Window Weatherstripping for Dust Protection
- Caulking and Sealing Window Frames for Airtight Protection
- Temporary Window Sealing Methods for Dust Storms
- Benefits of Interior Storm Window Inserts and Air Filtration
- DIY vs Professional Window Sealing: When to Call an Expert
Last Updated: July 12, 2026
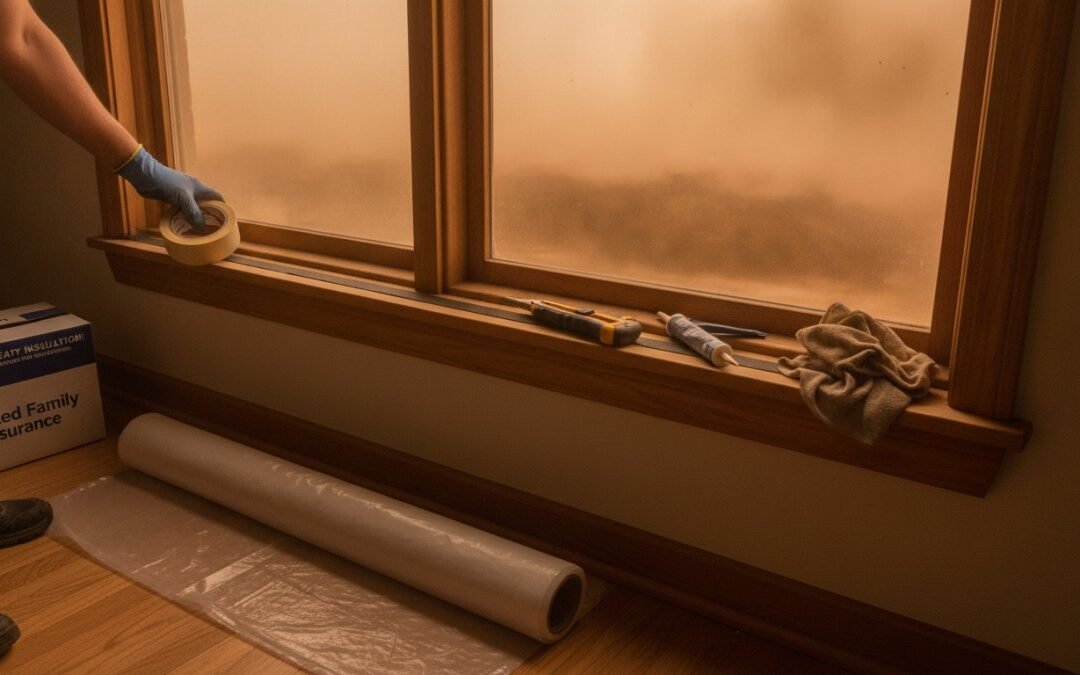
Dust storms in Las Vegas can turn day into twilight and coat homes with fine particulate matter. Protecting your home’s interior requires strategic window sealing. This guide explains how to seal windows for dust storms using practical, tested methods.
At United Family Insurance, we understand that protecting your home from environmental hazards is essential to maintaining both your property and your family’s health. Dust infiltration through windows can damage electronics, aggravate respiratory issues, and create costly cleanup situations. Below, we’ll show you exactly how to seal windows for dust storms with materials you can find locally and techniques that don’t require professional installation.
How to Seal Windows for Dust Storms: What You’ll Need
Materials and Tools Checklist
Gather weatherstripping materials: adhesive-backed foam tape, rubber compression seals, or silicone-based weatherstripping. Rope caulk (caulking cord) is essential for temporary sealing, it sticks without permanent adhesion and peels off cleanly. For permanent solutions, use silicone or acrylic latex caulk.
Basic tools include a caulking gun, utility knife, putty knife, and wire brush for cleaning tracks. Prepare a vacuum with brush attachment, damp cloth, and rubbing alcohol for degreasing. A measuring tape ensures correct weatherstripping lengths.
For interior storm window inserts, you may need double-sided tape or adhesive strips rated for window use. Have a stepladder ready for high windows and safety glasses for overhead work.
Buy weatherstripping in longer rolls rather than pre-cut strips. You’ll save money and can cut exact lengths for each window. Store unused material in a cool, dry place, adhesive-backed products lose stickiness if exposed to heat.
Identifying Window Air Leaks and Dust Entry Points
Dust concentrates where air leaks exist: gaps between sash and frame, deteriorated weatherstripping, and separation at the window casing where the frame meets the wall.
Where Dust Infiltrates Most
The most common entry point is the sash-to-frame gap on sliding windows. These tracks accumulate dust and debris, creating channels for air infiltration. Double-hung windows leak where the lower sash meets the upper sash and where both meet the frame. Casement windows fail at hinge seals and along the perimeter where the sash closes against the frame. Window corners are vulnerability zones where frame members meet.
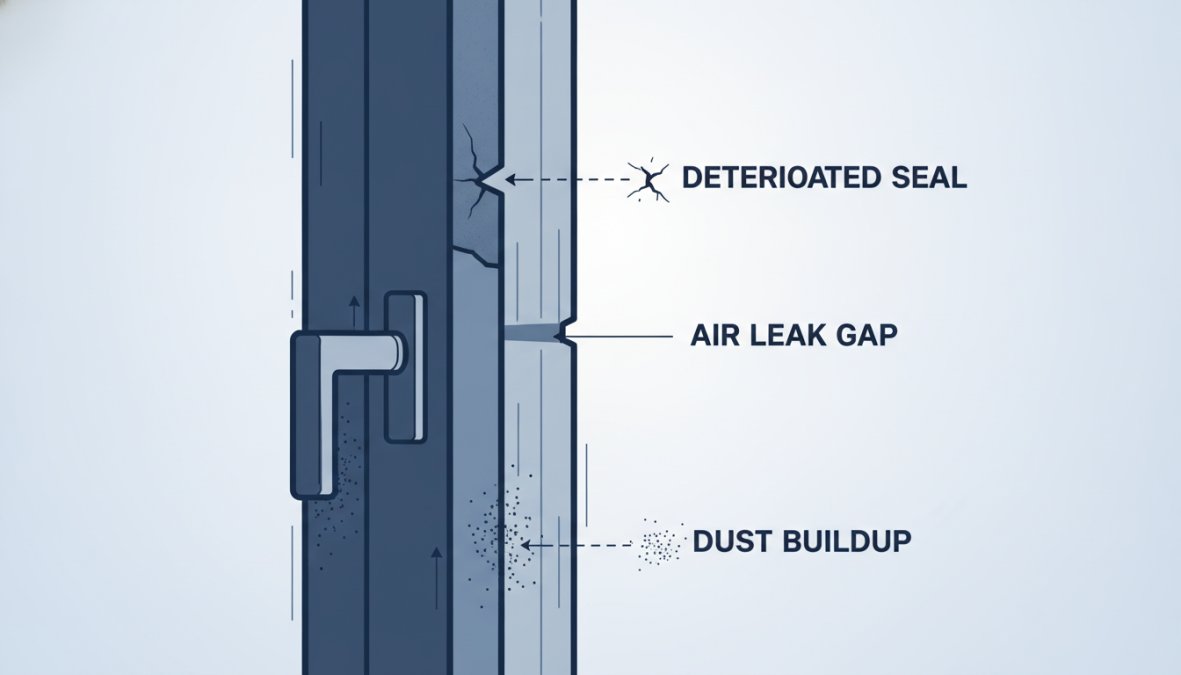
To locate leaks, perform a visual inspection on a calm day. Look for dust accumulation along sash edges and in tracks. On a windy day, hold a lit candle near the sash perimeter, flame movement indicates air infiltration. Check existing weatherstripping by pressing it with your finger; if it doesn’t spring back or feels brittle, it’s no longer sealing effectively. Examine exterior caulk for cracks, gaps, or separation.
Pay special attention to older windows. Homes built before 1980 often have single-pane windows with minimal weatherstripping and loose-fitting frames. These are particularly vulnerable during storms.
Don’t assume all leaks are obvious. Some gaps are too small to see but large enough to pass fine dust particles. Test every window systematically.
How to Clean Dust Out of Window Tracks Before Sealing
Sealing over dirty tracks traps dust inside and reduces weatherstripping effectiveness. Thorough cleaning is non-negotiable.
Preparing Frames and Sashes for Weatherstripping
Start with vacuum cleaning using the brush attachment. Work slowly, making multiple passes to extract embedded particles. For stubborn buildup, use an old toothbrush or soft wire brush while vacuuming.
After vacuuming, wipe tracks with a damp cloth. For windows with accumulated grime, use a cloth dampened with equal parts water and white vinegar. Allow tracks to dry completely, at least 2 hours, before applying weatherstripping. Moisture prevents adhesive from bonding properly.
Clean frame surfaces where weatherstripping will adhere by wiping with rubbing alcohol to remove oils and dust. For windows with cracked exterior caulking, scrape away loose material using a putty knife. Apply silicone lubricant to metal sash channels if movement is stiff.
Clean windows seal better. Dust and oils on frame surfaces prevent weatherstripping adhesive from bonding and reduce caulk adhesion by up to 40%. Spend time on this step, it’s the foundation for all subsequent sealing work.
Best Window Weatherstripping for Dust Protection
Weatherstripping materials vary in durability, cost, and effectiveness. Choosing the right type ensures your sealing effort lasts through multiple dust storm seasons.
Compression Seals and Adhesive Strips
Rubber compression seals are among the most effective options. These solid rubber strips compress when the window closes, creating an airtight seal. They typically last 5-7 years in Nevada’s dry climate before hardening.
Adhesive-backed foam tape is the most accessible option for DIY installation. It’s inexpensive and applies in minutes, but degrades faster, typically lasting 2-3 years. In Las Vegas‘s heat, foam tape may lose stickiness within the first year if exposed to direct sun. Choose closed-cell foam rather than open-cell varieties.
Silicone-based weatherstripping combines durability with flexibility. Silicone strips remain pliable in extreme heat and cold and resist UV degradation, lasting 7-10 years. The trade-off is cost, silicone weatherstripping runs two to three times the price of foam tape.
V-strip (tension seal) weatherstripping fits into the sash channel and is nearly invisible when installed. It works well for sliding windows but is difficult to install on double-hung windows. Dust can work around V-strip if not installed with precision.
For maximum dust protection, combine weatherstripping types. Use compression seals on the sash-to-frame interface and foam tape on the frame-to-casing junction. This layered approach creates redundancy.
Window Type Compatibility
Sliding windows benefit most from compression seals on top and bottom tracks. Apply weatherstripping to the stationary frame on both sides of the slider to seal vertical gaps.
Double-hung windows need weatherstripping at three locations: where the lower sash meets the frame, where the upper sash meets the frame, and where the two sashes meet in the middle. The meeting rail is a critical dust entry point, use compression seals here rather than foam tape.
Casement windows require weatherstripping along the entire sash perimeter. Focus on the latch side and top and bottom edges. Casement windows typically seal better than sliding windows because the sash presses against the frame along its entire perimeter when closed.
Fixed windows only need weatherstripping and caulking at the frame-to-casing junction. For windows with Fibrex or composite frames, use adhesive weatherstripping rated for composite materials.
Compression seals work best for windows that close firmly against the frame with minimal play. Foam tape is ideal for windows with slight warping or inconsistent frame surfaces.
Caulking and Sealing Window Frames for Airtight Protection
Caulking creates a permanent seal between the window frame and building structure. Inspect exterior caulk for cracks, separation, or missing sections. Even small cracks (1/16 inch or larger) allow fine dust particles to pass during wind-driven storms.
Remove loose or cracked caulk using a putty knife. Apply new caulk using a caulking gun. Silicone caulk is superior to acrylic latex for exterior use in Nevada. Silicone remains flexible in temperature extremes, resists UV degradation, and lasts 10-15 years. Use 100% silicone caulk rather than silicone-latex blends.
Load the caulking gun and cut the nozzle at a 45-degree angle. Apply steady, even pressure while moving the gun along the gap. Smooth the caulk with a wet finger immediately after application. Pay particular attention to the bottom of the window frame and corners where frame members meet.
Allow caulk to cure fully before exposing it to weather, most silicone caulks cure in 24-48 hours.
Using Rope Caulk for Gaps and Temporary Sealing
Rope caulk is a pliable, putty-like material that sticks without permanent adhesion. Press it firmly into gaps around the sash, working it into corners and along the full length of the gap. Rope caulk conforms to irregular surfaces and fills gaps up to 1/2 inch wide.
Rope caulk works exceptionally well for the meeting rail on double-hung windows and for gaps between the lower sash and sill on sliding windows. Its firmness resists compression. The primary advantage is removability, simply peel it away when storm season ends with no residue remaining.
Apply rope caulk in layers for gaps wider than 1/4 inch. This creates a thicker seal less likely to be accidentally dislodged.
Temporary Window Sealing Methods for Dust Storms
When a major dust storm is forecast and you haven’t had time for permanent sealing, temporary methods can significantly reduce dust infiltration.
Quick Solutions During Storm Season
Plastic sheeting is the fastest emergency seal. Use heavy-duty plastic (4-6 mil thickness) and duct tape to seal windows completely. Cut plastic to overlap the window frame by 6 inches on all sides and tape securely. This completely blocks dust infiltration but also blocks light and ventilation.
Masking tape combined with rope caulk provides a middle-ground solution. Apply rope caulk to gaps, then seal the perimeter with painter’s tape. This reduces dust infiltration by 70-80% while allowing the window to be opened if needed.
Weatherstripping tape can be applied in an emergency. If you keep a roll on hand, you can apply it to critical windows within 30 minutes. This provides better protection than rope caulk alone and remains effective for 2-3 weeks.
For difficult-to-seal windows, consider interior window coverings. Heavy curtains or cellular shades reduce dust infiltration by blocking air movement. Close curtains during storms to minimize dust accumulation on windowsills.
Run HVAC systems with MERV-13 or higher filters. These filters capture fine dust particles that may penetrate temporary seals. Change filters monthly during dust storm season rather than quarterly.
Benefits of Interior Storm Window Inserts and Air Filtration
Interior storm window inserts provide a secondary barrier against dust infiltration. They’re particularly effective for older windows with poor original seals.
Interior storm inserts are thin plastic or acrylic panels that fit inside the window frame, creating an air gap between the insert and exterior window. This air gap acts as insulation and a dust barrier. Dust that penetrates the exterior window is trapped in the air gap rather than entering the home.
Removable inserts offer flexibility, install them before storm season and remove them when storms subside. The cost varies based on window size and insert type, but the investment pays dividends through reduced dust infiltration and improved insulation.
Integrating Filtration with Window Sealing
Sealing windows reduces dust infiltration, but some dust always penetrates. Combining window seals with indoor air filtration creates comprehensive dust protection. Upgrade to MERV-13 filters or higher. MERV-13 filters capture particles as small as 1 micron, which includes most dust storm dust.
Change filters more frequently during dust storm season, monthly versus quarterly in normal conditions. Portable HEPA air filters provide supplementary filtration for individual rooms, capturing 99.97% of particles 0.3 microns and larger. Place units in bedrooms and living areas.
Maintaining indoor humidity at 40-50% reduces dust suspension and makes particles easier for filters to capture.
Window sealing and air filtration work together. Sealing reduces dust entry; filtration captures what does enter. The combination provides protection that neither approach alone can achieve.
DIY vs Professional Window Sealing: When to Call an Expert
Most window sealing tasks are within reach of homeowners with basic tools and patience. Applying weatherstripping to sliding windows takes an hour per window and requires only scissors and a tape measure. Caulking exterior frames is similarly manageable.
DIY becomes problematic with high windows requiring extended ladders or scaffolding. Falls are a real risk. If windows are severely damaged, frames are cracked, sashes are warped, or caulk is missing in large sections, professional assessment is wise.
For windows with complex geometry (arched tops, multiple panes, decorative muntins), professional installation ensures weatherstripping is applied correctly. Professional window sealing in Las Vegas typically costs between modest amounts per window, depending on size and complexity.
For homeowners with moderate DIY skills, a hybrid approach works well. Handle straightforward weatherstripping and rope caulk yourself, and hire professionals for high windows or complex sealing tasks.
United Family Insurance can help protect your home against weather-related damage that dust storms may cause. Our comprehensive home coverage includes protection for window damage and interior damage from dust infiltration. Get a quote today to ensure your property is fully protected.
Dust storms in Nevada demand proactive window sealing to protect your home’s interior and your family’s health. Whether you choose weatherstripping, caulking, or interior storm inserts, start before storm season arrives. Combine your sealing efforts with quality air filtration and regular maintenance to maintain dust protection year after year. United Family Insurance provides coverage tailored to Nevada properties, securing affordable, comprehensive protection that gives you peace of mind through dust storm season and beyond.
| Sealing Method | Best Window Type | Durability | Cost | Installation Time |
|---|---|---|---|---|
| Adhesive foam weatherstripping | Sliding, casement | 2-3 years | Low | 15 minutes per window |
| Compression seals | Double-hung, sliding | 5-7 years | Moderate | 30 minutes per window |
| Silicone weatherstripping | All types | 7-10 years | High | 45 minutes per window |
| Exterior silicone caulk | Frame perimeter | 10-15 years | Moderate | 1-2 hours per window |
| Rope caulk | Temporary gaps | Seasonal | Low | 10 minutes per window |
| Interior storm inserts | Older windows | 10+ years | High | Professional installation |
Nevada Division of Environmental Protection air quality standards
American Society of Home Inspectors guide to weatherization
EPA recommendations for indoor air quality during dust events
Frequently Asked Questions
What is the best way to seal windows for dust storms?
The most effective approach combines multiple methods: clean window tracks thoroughly, apply high-quality weatherstripping to sashes and frames, caulk permanent gaps with sealant, and consider interior storm window inserts for maximum protection. Rope caulk works well for temporary sealing. The key is creating an airtight seal that blocks fine particulate matter while maintaining proper ventilation. Different window types may require different materials, so assess your specific window design before selecting sealing products.
Does weatherstripping help with dust storms and fine dust infiltration?
Yes, weatherstripping is highly effective for blocking dust infiltration when installed correctly. Compression seals and adhesive strips create barriers around sashes and frames that prevent fine particulate matter from entering. For dust storm protection, choose weatherstripping rated for air sealing rather than just draft prevention. Ensure proper installation on all moving parts and check annually for wear. Weatherstripping works best when combined with caulking and regular maintenance of window tracks.
Can you use temporary window sealing methods like tape or rope caulk for dust storms?
Yes, temporary solutions like rope caulk and painter's tape can provide quick dust protection during storm season. Rope caulk is removable and doesn't damage window frames or sashes, making it ideal for renters or seasonal use. Painter's tape can seal gaps temporarily but is less durable. These methods work best for supplementing permanent weatherstripping rather than replacing it. Apply them before dust season and remove after storms pass. Temporary sealing is most effective when combined with interior storm window inserts for comprehensive protection.
How often should I maintain and inspect sealed windows to prevent dust infiltration?
Inspect windows monthly during dust storm season and quarterly during calm periods. Clean window tracks every 4-6 weeks to remove accumulated dust and debris that can compromise seals. Check weatherstripping annually for cracks, peeling, or compression loss, replace if damaged. Test for air leaks using smoke or a candle flame near frames. In Las Vegas and desert regions with frequent haboobs, increase inspection frequency to catch deterioration early. Proper maintenance extends the life of sealing materials and ensures consistent dust protection year-round.