
Table of Contents
- How to Protect Foundation From Flash Floods: A Step-by-Step Guide
- Step 1: Assess Your Foundation and Flood Risk
- Step 2: Install and Maintain Gutters and Downspouts
- Step 3: Implement Foundation Waterproofing Methods
- Step 4: Manage Grading and Slope Around Your Home
- Step 5: Deploy Best Flood Barriers for Homes
- Step 6: Install a Sump Pump and Understand Installation Cost
- Step 7: Set Up Smart Home Flood Sensors and Monitoring
Last Updated: July 11, 2026
How to protect foundation from flash floods requires a multi-layered approach combining inspection, maintenance, waterproofing, and strategic drainage solutions. Flash flooding poses a significant threat to home foundations, particularly in areas prone to heavy rainfall and rapid water accumulation. Below, we’ll show you exactly how to protect foundation from flash floods through seven actionable strategies that address both immediate vulnerabilities and long-term structural integrity.
Foundation damage from water intrusion can cost thousands to repair, and prevention is far cheaper than remediation. This guide covers everything from identifying existing water damage to installing modern flood-sensing technology that alerts you to problems before they become catastrophic.
What You’ll Need Before Starting
Gather essential tools: a flashlight, moisture meter, and basic hand tools including a hammer, chisel, and caulking gun. Stock hydraulic cement, polyurethane sealant, and masonry caulk for sealing work. Wear gloves, safety glasses, and a dust mask when working with concrete products. Have shovels and heavy-duty sandbags on hand for temporary barriers. Consider purchasing a smart home flood sensor system before water problems develop, early warning systems are far more valuable than emergency response after flooding occurs.
Step 1: Assess Your Foundation and Flood Risk
Start by understanding your specific vulnerability. Walk around your home’s perimeter and note where water naturally pools during rain. Look at your neighbors’ yards; water flows downhill, and their drainage problems often predict yours.
Annual Foundation Inspections
Conduct a thorough foundation inspection at least once per year, preferably in spring before heavy rain season. Look for visible cracks, efflorescence (white mineral deposits indicating water seepage), and staining. Use your moisture meter to check concrete surfaces; readings above 20% indicate potential water intrusion problems. Pay special attention to the wall-to-foundation connection.
Check for signs of previous water damage: discoloration, mold growth, or rust stains from rebar. According to FEMA flood mitigation guidelines, homes in flood-prone areas should have professional inspections every two years to catch structural issues early.
Use a handheld moisture meter on multiple spots along your foundation walls. If readings vary significantly between areas, it suggests localized water intrusion points that need immediate attention.
Identifying Signs of Foundation Water Damage
Horizontal cracks that run across your foundation wall indicate hydrostatic pressure, water pushing against the concrete from outside. These are more serious than vertical cracks and suggest your drainage system is failing. Efflorescence appears as white, chalky deposits on concrete surfaces, a clear sign that water is moving through your foundation.
Seepage, water slowly entering through cracks or porous concrete, is the most common problem. It may appear as wet spots on basement walls, water stains on stored items, or damp insulation. The longer seepage continues, the more structural damage occurs and the higher your risk of catastrophic flooding during heavy rainfall.
Step 2: Install and Maintain Gutters and Downspouts
Your gutters are the first line of defense against foundation flooding. They intercept rainfall before it reaches the ground, then channel it safely away from your home. Clogged gutters defeat this purpose entirely.
Clean your gutters at least twice per year: once in late fall after leaves drop, and again in spring before heavy rain season. Install gutter guards or screens to reduce debris accumulation. Downspouts must extend at least 5-6 feet away from your foundation, directing runoff well clear of the building. Many homes have downspouts that terminate just 1-2 feet from the foundation, this is a primary cause of foundation water damage.
Downspouts draining directly against your foundation wall create a direct path for water intrusion. Extend every downspout to at least 5-6 feet away, or install underground drainage pipes that carry water to your street or drainage easement.
For homes in Las Vegas with seasonal flash flood risk, consider installing rain barrels to capture initial runoff, then directing overflow through extended downspouts.
Step 3: Implement Foundation Waterproofing Methods
Once you’ve addressed drainage, focus on waterproofing the foundation itself. This involves sealing cracks, applying moisture barriers, and in some cases, installing more comprehensive waterproofing systems.

Hydraulic Cement and Masonry Caulk for Cracks
Hydraulic cement is the standard repair material for active water leaks in concrete. Unlike regular concrete patching compounds, hydraulic cement expands as it sets, creating a watertight seal even in wet conditions.
To apply hydraulic cement, clean the crack thoroughly with a wire brush to remove loose concrete and debris. Use a cold chisel to widen the crack slightly, creating better adhesion. Dampen the crack with water but don’t leave standing water. Mix the hydraulic cement according to manufacturer instructions and pack it firmly into the crack using a putty knife. Overfill slightly, then smooth flush with the surrounding concrete.
Masonry caulk works for hairline cracks and gaps. Polyurethane sealant is the superior choice because it remains flexible as concrete expands and contracts with temperature changes.
Interior and Exterior Moisture Barriers
Interior waterproofing coatings seal the concrete surface but don’t stop water pressure from outside. Apply a concrete sealer to all interior basement walls to prevent moisture vapor from migrating through the concrete.
Exterior waterproofing is more effective because it stops water before it reaches the concrete. A proper exterior moisture barrier involves excavating around your foundation, applying a waterproof membrane to the exterior concrete surface, and installing drainage board. For budget-conscious homeowners, start with interior sealing and focus your investment on improving exterior drainage.
Step 4: Manage Grading and Slope Around Your Home
Soil grading determines where water flows around your foundation. Proper grading slopes away from the home at a minimum 1-inch drop per foot of distance from the foundation, extending at least 6 feet outward.
Correcting Soil and Drainage Issues
Inspect the soil around your foundation perimeter. If you see water pooling against the foundation after rain, grading is your problem. Add clean, compacted soil to build up the grade sloping away from the home. Avoid piling soil against your foundation’s wooden sill plate, as this can lead to wood rot and termite damage.
For homes in Las Vegas where water drainage is complicated by hardscape, consider installing French drains. These are trenches filled with gravel and perforated pipe that intercept water before it reaches your foundation. Native landscaping for drainage also works, plant native shrubs and groundcovers that tolerate both wet and dry conditions, improving soil structure and water infiltration.
Step 5: Deploy Best Flood Barriers for Homes
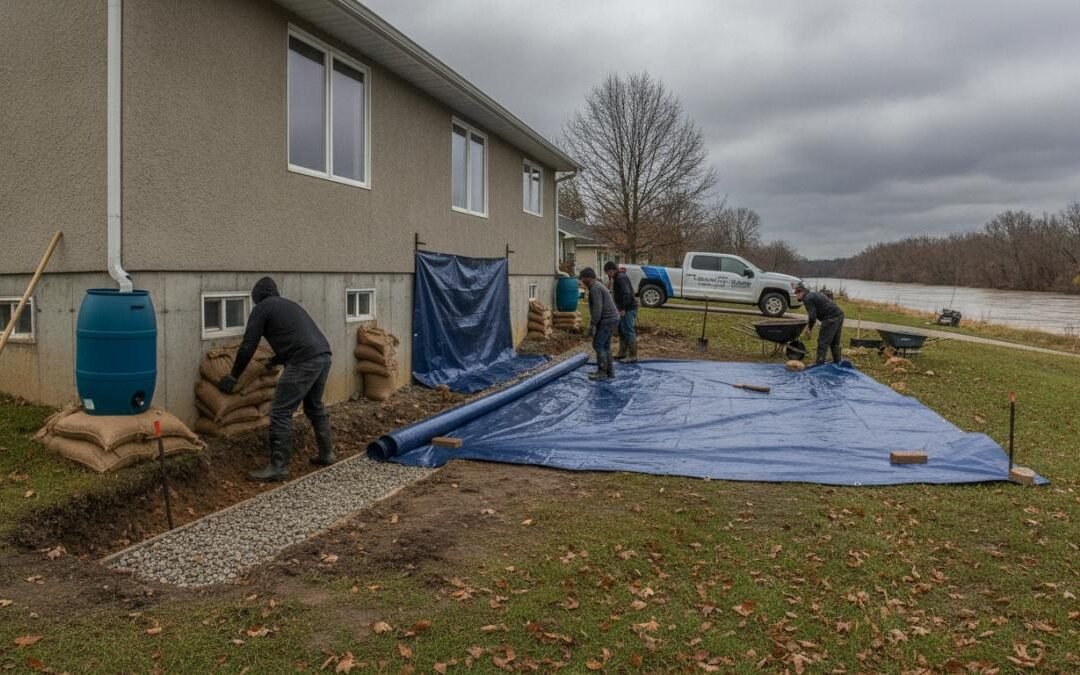
When heavy rain is forecast or during actual flooding events, temporary barriers provide critical protection. These are emergency measures that reduce water intrusion during acute flooding.
Installing Sandbags as Temporary Barriers
Sandbags work by creating a physical dam that redirects water around your foundation or basement entry points. Fill sandbags with sand or soil, not water. Stack sandbags in a pyramid formation against vulnerable areas, starting with a double row at ground level, then offsetting the second row on top.
The challenge with sandbags is that they require advance preparation. Pre-position sandbags before flood season if you live in a flood-prone area. Some municipalities provide free sandbags during flood season.
Sandbags are most effective when positioned before water arrives. A barrier that redirects water around your foundation is far more effective than trying to stop water that’s already flowing against your home.
Alternative temporary barriers include water-filled bladders and removable flood walls that attach to your foundation or door frames.
Step 6: Install a Sump Pump and Understand Installation Cost
A sump pump is a mechanical system that removes water that has entered your basement or crawlspace. It sits in a sump pit and automatically activates when water reaches a certain level, then discharges water away from your home through a discharge line.
Installation involves digging a sump pit, installing the pump and check valve, and running a discharge line at least 10 feet from your foundation. Before committing to installation, ensure your drainage and grading are optimized. Many homes don’t need sump pumps if they have proper drainage systems.
Step 7: Set Up Smart Home Flood Sensors and Monitoring
Modern flood sensors connect to your home’s smart system, sending alerts to your phone when water is detected. Place sensors in your basement, crawlspace, and near sump pump discharge lines.
Smart flood sensors use capacitive or conductivity technology to detect moisture. When water touches the sensor, it immediately sends a notification to your phone. The advantage is that you don’t need to be home to detect problems, a burst pipe or unexpected seepage triggers an alert while you’re at work.
Installation is straightforward; most sensors are battery-powered and require no wiring. Check battery levels quarterly and replace sensors every 5-7 years. Research from National Institute of Standards and Technology flood resilience studies indicates that early warning systems reduce flood damage by an average of 30% by enabling rapid response.
How to Protect Foundation From Flash Floods: Summary and Action Plan
The comprehensive approach to protecting your foundation involves multiple layers working together. Start with assessment, understand your specific flood risk and identify existing vulnerabilities. Then implement drainage improvements: extend downspouts, optimize grading, and ensure gutters are clean and functional.
Address foundation waterproofing by sealing cracks and applying moisture barriers. Install a sump pump if water intrusion is inevitable despite preventive measures. Finally, add smart monitoring so you’re immediately aware of problems.
| Protection Layer | Priority | Effort Level | Cost Range |
|---|---|---|---|
| Gutter cleaning and downspout extension | High | Low | Minimal |
| Foundation inspection and crack sealing | High | Moderate | Low to moderate |
| Grading and slope correction | High | Moderate | Low to moderate |
| Interior waterproofing sealer | Medium | Low | Low |
| Sump pump installation | Medium | High | Moderate |
| Smart flood sensors | Medium | Low | Low |
| Exterior waterproofing membrane | Low | High | High |
Start with the high-priority items that require minimal effort and cost. These address the most common causes of foundation water damage. Even modest improvements to drainage and grading significantly reduce your flood risk.
Foundation flooding is one of the most preventable home disasters, yet many homeowners neglect these protections until water damage forces their hand. United Family Insurance understands that protecting your home requires both preventive action and comprehensive insurance coverage. Our home insurance policies cover water damage from flooding when you have proper flood insurance. Get a quote from United Family Insurance today and secure the protection your foundation deserves.
Frequently Asked Questions
Can flash floods damage a house foundation?
Yes, flash floods cause serious foundation damage through water intrusion, hydrostatic pressure, and structural integrity compromise. Water can seep through cracks, weaken masonry, and destabilize the wall-to-foundation connection. Even brief flooding can lead to long-term moisture damage, mold, and foundation settlement if not addressed immediately.
What are the best foundation waterproofing methods for flood protection?
Effective waterproofing combines multiple approaches: seal foundation cracks with hydraulic cement or epoxy, apply polyurethane sealant to masonry, install interior or exterior moisture barriers, and manage perimeter drainage. Combining these methods with proper grading and downspout placement creates comprehensive protection against water intrusion and runoff accumulation around your foundation.
How do I know if my foundation has flood damage?
Signs of foundation water damage include visible cracks, efflorescence (white mineral deposits), musty odors, water stains, bowing walls, and structural settling. Check your foundation during and after heavy rain. Early detection through annual foundation inspections prevents costly repairs. Document any changes and consult a professional if you notice new cracks or seepage.
Does flood insurance cover foundation damage from flash floods?
Standard homeowners insurance typically does not cover flood damage. You need separate flood insurance through the National Flood Insurance Program (NFIP) or private carriers. Coverage depends on your flood zone, property elevation, and policy limits. Contact United Family Insurance to compare flood insurance options and ensure your foundation and home are adequately protected against flash flood events.